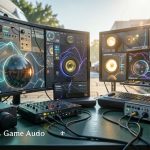
Introduction to Audio in Unity
Audio plays a crucial role in creating immersive and engaging gaming experiences in Unity. Sound not only enhances the atmosphere but also provides valuable feedback to players, helping to convey emotions, highlight actions, and reinforce the game’s narrative. Implementing effective Unity audio can elevate a game from being just visually appealing to truly captivating.
Unity audio capabilities are extensive and provide developers with a versatile toolkit for integrating sound into their games. At its core, Unity supports various audio formats and offers a built-in audio engine to manage playback, mixing, and 3D spatialization of sounds. This flexibility allows game creators to implement everything from background music and sound effects to voice-overs and complex audio interactions.
One of the key features of Unity audio is its component system. Developers use Audio Source components to attach sounds to game objects, controlling when and how audio is played. Unity’s Audio Listener acts like the player’s ears, capturing all sounds in the scene and determining how they are perceived based on position and environment. Together, these components provide a powerful foundation for realistic game sound implementation.
Moreover, Unity offers an Audio Mixer for sophisticated audio management, allowing developers to create audio groups, apply effects, and balance sound levels dynamically during gameplay. This tool is essential for mixing music tracks, ambient sounds, and effects so they blend seamlessly without overpowering the player. Unity’s support for real-time audio manipulation also enables adaptive soundtracks and reactive audio cues that respond to gameplay events.
In summary, the audio basics in Unity cover a broad spectrum of tools and features that empower developers to integrate high-quality sound effectively. Understanding and leveraging these audio capabilities is key to successful game sound implementation, helping to deliver an engaging and memorable audio experience to players.
Unity Audio System Overview
- AudioSources: These are the core components for playing sounds in Unity. AudioSources allow you to attach audio clips to game objects, control playback, volume, pitch, and spatial settings, making them essential for dynamic sound generation in a game environment.
- AudioListeners: Acting like the “ears” of the player, AudioListeners capture sounds in the scene from the perspective of the assigned camera or player object. Typically, there is one AudioListener in a scene that processes all audio heard by the player, enabling a 3D spatial audio experience.
- AudioMixers: Unity’s audio engine includes AudioMixers to manage and manipulate audio output. AudioMixers allow grouping multiple AudioSources, applying effects like reverb or EQ, and mixing sound levels. This flexible sound architecture supports creating complex audio environments and fine-tuning overall game sound quality.
- Audio Engine: At the heart of Unity’s sound architecture is its robust audio engine, handling audio playback, mixing, and spatialization efficiently. It supports various audio formats and real-time effects processing to deliver immersive audio experiences that adapt to gameplay dynamics.
- Sound Architecture Integration: Unity’s audio system integrates seamlessly with other Unity components, allowing developers to script behaviors, trigger sounds based on events, and synchronize audio with animations or game states.
Supported Audio Formats and Compression
Unity supports a variety of audio formats to suit different project needs. Commonly used audio formats include WAV, MP3, AIFF, and Ogg Vorbis. WAV files are uncompressed and offer the highest audio quality, making them ideal for short sound effects where fidelity is crucial. MP3 and Ogg Vorbis formats are compressed formats used mostly for music and longer audio clips to reduce file size while preserving quality. AIFF is similar to WAV in being uncompressed and is often used on Mac systems.
When importing audio into Unity, it’s essential to consider compression settings. Unity’s audio import settings allow you to choose between decompressing on load, streaming, or compressed in memory. Compressing audio files helps optimize performance by reducing memory usage and load times, especially important for mobile and VR platforms. The Ogg Vorbis format is highly recommended for compressing music and ambient sounds because of its efficient compression without significant quality loss.
Best practices for compression include balancing file size and audio quality to minimize runtime memory impact. Short sound effects are often better left uncompressed for immediate playback, while longer tracks benefit from compression. Adjusting the bitrate for compressed formats like Ogg Vorbis can also help fine-tune performance. Additionally, Unity’s import settings let you fine-tune the sample rate and load type, enabling you to optimize audio specifically for your game’s platform and performance requirements.
By understanding supported audio formats and applying compression best practices, you can efficiently manage audio in Unity projects, ensuring smooth gameplay and immersive sound experiences with minimal performance overhead.
Implementing and Controlling Audio
Adding audio to your Unity project greatly enhances the player experience by making your game feel more immersive. To play sounds in Unity, you first need to add an Audio Source component to the GameObject that will emit the sound. This component allows you to assign audio clips, which can be sound effects, music, or any audio asset you want to use.
To add an audio clip, select your GameObject in the hierarchy, then click on “Add Component” in the Inspector panel and select “Audio Source.” You can then drag and drop your audio file into the Audio Clip field. By default, the audio will play when the GameObject becomes active if the Auto Play option is checked, but you can control playback using scripts for more precise audio control.
Audio scripting in Unity is straightforward and powerful. You can use C# scripts to control when and how sounds play. For example, by accessing the Audio Source component in your script, you can play, pause, stop, or loop the audio clip. This allows you to trigger sound effects in response to player actions, game events, or other conditions dynamically at runtime.
Here’s a basic script example to play a sound effect:
AudioSource audioSource = GetComponent<AudioSource>();
audioSource.Play();
In addition to playing sounds, you can manipulate various audio properties through scripts to enhance the player’s auditory experience. Parameters such as volume, pitch, and spatial blend can be adjusted dynamically to create realistic soundscapes. For instance, lowering the volume when a player moves away from a sound source or changing the pitch for special effects.
Using Unity’s scripting API, you can also implement more advanced audio controls like fading sounds in and out, pausing and resuming playback, or applying audio filters. This flexibility gives you full control over how sound effects are delivered and experienced in your game.
In summary, implementing and controlling audio in Unity involves attaching audio clips to GameObjects via Audio Source components and using audio scripting to manage playback and manipulate sound properties. By mastering these techniques, you can create dynamic and engaging sound effects that significantly enhance your game’s atmosphere and player immersion.
Adding Audio Sources and Listeners
In Unity, adding and configuring the AudioSource and AudioListener components are essential steps to implement audio in your scene effectively. These Unity components work together to create and capture sound within the game environment.
- Add AudioSource: Select the GameObject in your scene where you want the sound to originate. In the Inspector panel, click “Add Component” and search for “AudioSource.” This component allows you to play audio clips and control their properties such as volume, pitch, and spatial settings.
- Configure AudioSource: After adding the AudioSource, assign an audio clip by dragging it into the “Audio Clip” field. You can tweak settings like “Loop” to control whether the sound repeats, and “Spatial Blend” to balance between 2D and 3D sound effects for immersive audio experiences.
- Add AudioListener: The AudioListener acts as the ears of your scene and is usually attached to the Main Camera. To add it, select the camera GameObject, then add the AudioListener component via the Inspector if it’s not already present. Only one AudioListener should be active in a scene to avoid audio conflicts.
- Adjust Listener Position: The location of the AudioListener determines from where the player hears sounds. Moving the listener or the camera changes audio perception, enabling realistic effects like panning and distance attenuation.
- Test and Fine-Tune: Play your scene and listen to the audio output. Adjust the AudioSource parameters or relocate the AudioListener as needed to create the desired audio atmosphere.
Controlling Audio with Scripts
In Unity, audio scripting allows you to dynamically control audio playback during runtime using the AudioSource component. This section provides sample C# code examples that demonstrate how to play, pause, stop, and adjust audio parameters, giving you full control over your game’s sound experience.
First, to play an audio clip attached to an AudioSource, you can call the Play() method:
AudioSource audioSource = GetComponent<AudioSource>();
audioSource.Play();
To pause the audio, use the Pause() method, which halts playback but maintains the current time position allowing you to resume later:
audioSource.Pause();
Stopping audio resets the playback time to the start. Use Stop() when you want to end the sound completely:
audioSource.Stop();
You can also adjust audio parameters like volume and pitch at runtime to create dynamic audio effects. For example:
audioSource.volume = 0.5f;  // Set volume to 50%
audioSource.pitch = 1.2f;   // Increase pitch by 20%
With these audio scripting capabilities, you can seamlessly integrate play, pause, stop audio functions and fine-tune the AudioSource control for an immersive sound environment in your Unity projects.
Using Audio Mixers for Advanced Control
In Unity, Audio Mixers are powerful tools that allow developers to group multiple audio sources and manage their sound properties collectively. This capability is essential for sound effects control, as it provides a streamlined way to apply effects and volume adjustments across groups of audio sources rather than handling each one individually.
To create an Audio Mixer, navigate to the Unity Editor’s Project window, right-click inside your Assets folder, then select Create > Audio Mixer. Once created, open the Audio Mixer window where you can add multiple audio groups, each representing a different set of sounds like background music, sound effects, or dialogue. These groups make it easier to organize and control related audio sources together.
Next, assign audio sources in your scene to the relevant audio groups by setting the Audio Source’s Output property to the desired group within the Audio Mixer. This grouping ensures that any adjustments made—whether changing volume levels, applying effects like reverb or EQ, or muting—affect all audio sources routed through that group simultaneously.
Using Audio Mixers also supports more advanced audio behaviors, such as dynamic volume changes based on gameplay events or smooth transitions between different audio states. Overall, leveraging audio groups within Audio Mixers gives you granular control and enhances the auditory experience with efficient management of sound effects control and other audio elements.
Optimizing and Enhancing Audio
When implementing audio in Unity, optimizing audio performance is crucial to ensure smooth gameplay and an immersive user experience. Poorly managed audio can lead to increased CPU usage, memory spikes, and decreased frame rates, which all negatively affect the overall performance of your game. To avoid these pitfalls, developers need to employ effective audio optimization techniques that balance sound quality with system performance.
One key technique is the use of audio compression and streaming. Compressing audio files reduces their size and bandwidth needs, allowing the game to load assets faster and maintain fluid playback. Unity supports various compressed audio formats like MP3, Ogg Vorbis, and AAC. Additionally, streaming large audio files instead of loading them completely into memory helps manage resources efficiently, especially for background music or lengthy ambient tracks.
Another powerful feature within Unity is 3D audio, which greatly enhances the spatial sound experience. By leveraging Unity’s built-in spatializer and audio source components, sounds can be placed in a 3D environment, giving players a realistic perception of distance and direction. This spatial sound capability is essential for creating immersive environments where audio cues help players locate objects or enemies, thereby improving gameplay interaction.
Adjusting the audio source settings, such as Doppler effect, spatial blend, and spread, can refine the way sound behaves in 3D space. Developers should also prioritize the use of occlusion and obstruction effects to simulate realistic audio dampening when sound passes behind objects or through walls. By carefully tuning these parameters, the auditory environment feels more authentic and believable.
Performance optimization also includes managing the number of simultaneous audio sources to reduce CPU load. Unity allows limiting the maximum number of concurrent sounds, and prioritizing key audio sources over less critical ones. Utilizing audio mixer groups and effects such as reverb and echo selectively can improve sound quality without overwhelming system resources.
Incorporating these techniques for audio optimization and spatial sound creates a richer audio landscape that elevates the player’s experience while maintaining high performance. Efficient use of 3D audio and sound effects not only enhances immersion but also ensures your game runs smoothly across various devices and hardware configurations.
Optimizing Audio for Performance
Optimizing audio in Unity is crucial for maintaining smooth gameplay and reducing unnecessary overhead. One of the primary methods to achieve this is through audio compression. By adjusting the compression settings, developers can significantly reduce the file size of audio assets without compromising too much on quality. Unity allows different compression formats such as MP3, Ogg Vorbis, and ADPCM, which provide a balance between quality and performance. Selecting the right format based on the game’s requirements helps in efficient memory usage and faster loading times.
Another performance tip involves using audio streaming rather than loading large audio clips fully into memory. Streaming is particularly effective for longer soundtracks or ambient audio. Instead of loading the entire clip at once, Unity streams the audio in small chunks, which considerably reduces memory consumption and keeps the application responsive. This technique prevents audio from being a bottleneck in terms of performance, especially on hardware with limited resources.
Memory management also plays a vital role in sound optimization. It is beneficial to unload unused audio clips and utilize efficient caching strategies. Unity’s AudioSource component offers options to control when and how audio data is loaded and released. Developers should monitor audio memory usage closely, using Unity’s profiling tools to identify and fix potential issues related to audio overhead. Combining these compression settings, streaming capabilities, and memory management techniques results in a well-optimized audio experience that enhances overall game performance.
Implementing 3D Spatial Audio
Creating immersive audio experiences in Unity is greatly enhanced by implementing 3D spatial audio. This technique simulates how sound behaves in a three-dimensional environment, giving players a sense of direction and distance for audio sources. To achieve this, Unity provides powerful tools such as the Unity spatializer plugin, which accurately renders spatial sound based on the listener’s position and the audio source’s location.
Start by attaching an Audio Source component to the game object that emits sound. Adjust the spatial blend parameter to control the mix between 2D and 3D audio. A value of 0 means the audio is fully 2D (non-spatialized), while a value of 1 makes it fully 3D, affected by distance and direction relative to the listener. Proper use of spatial blend helps create realistic audio panning, where sounds move smoothly across the stereo or surround sound field as the player or objects move around.
Fine-tuning settings like Doppler level, spread, and rolloff mode further refines the spatial effect. Doppler level enhances the perception of relative motion through pitch changes, while spread controls how wide the sound appears to emanate. Rolloff mode adjusts how audio volume decreases with distance, mimicking real-world acoustics. By combining these settings with the Unity spatializer, developers can craft rich, dynamic environments where 3D audio significantly boosts immersion and situational awareness.